


|
|
 |
 |
 |
|
|

Antentop is FREE e-magazine devoted to Antennas and Amateur Radio an
Special page devoted to
Building a Ground Tuner (Artificial Earth) by ZS1JHG

Custom Search
|
ANTENTOP-
01- 2020, # 024
|
Building
a Ground Tuner |
||
|
|
|
||
|
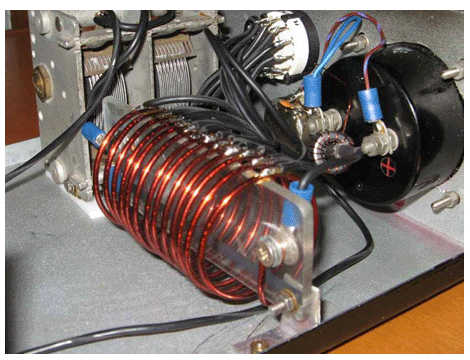
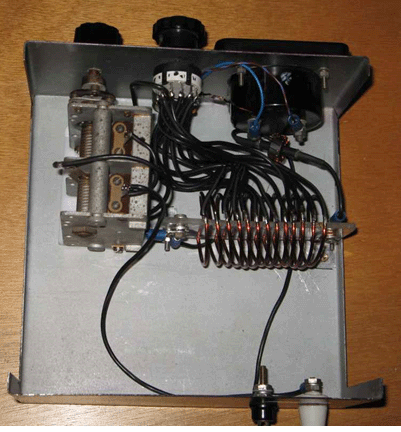
Remove the coil from the former and slide
onto the acrylic and secure with two bolts. See photo for method I used to attach to the
case Recommended to mount the coil in the case
close to the rotary 12 way switch to minimise the connecting wire length. Also use heavy 1.5mm insulated wire. The variable capacitor needs
to be insulated from the case and the shaft fitted with
an insulated extension. Plastic tubing can be used and a cut- off piece from the plastic shaft of a switch
or variable resistor. A piece of acrylic (Perspex) can be inserted
under the variable capacitor and the acrylic attached to the case
with short standoff mounts |
|
||
|
This is so you can bolt the variable capacitor
to the acrylic without the mounting bolts touching the case . Remember to make the acrylic long enough to take the
capacitor mounting hardware and standoff mounts to the casing.
As can be seen from the photos I used an alternative
method of winding the toroid. I used 20 turns of 0.5mm (24swg)enamelled copper wire which are spaced evenly around the
toroid. The centre primary winding consists of a short piece of
RG58 coax passing through the toroid with the centre conductor
only connected. This is a pain if you do not have a chassis
punch or Nibbler, I Scribed a 50mm circle (the size of my meter
)on the face plate and drilled a circle of 2mm and then
enlarged to 3mm holes ,a cold chisel was used to join two of the
hole and the rest cut out with a mini hacksaw. File to a nice
smooth round 50mm hole, make a template for the four meter mounting
holes and transfer to the faceplate punch and drill. Take care
with this as you want your meter to be square with the edges of
your box. |
How to Operate your
Ground Tuner (with input from the MFJ-931 manual) Connect your
transmitters Earth (or Ground) post to the binding post of the
Ground tuner marked Input from TX Chassis (Earth). |
||
|
|
|
||
|
|
|
||
|
|
Page- 89 |
||
 |
 |
|
 |
|
|
|||
Just for Fun:

Powered byIP2Location.com
Thanks for your time!
Last Updated:
January 30, 2021 21:14

